People spend money on cameras when they should spend attention on light. A modest camera in good light looks better than an expensive camera in bad light, and it is not close. The reason most home videos look amateur has almost nothing to do with the lens and almost everything to do with where the light is coming from. Once you understand a few basic arrangements, you can walk into any room and shape it on purpose instead of hoping the overhead bulb cooperates. The good news is that you do not need a kit full of expensive panels to do this. You need one or two sources and the willingness to move them around until the face looks right.
Before the setups, learn the one rule that ties them all together. Light should generally come from the front and slightly to the side, a little above eye level, pointing down toward the face. Flat light straight on makes a face look washed out and lifeless, while light from directly overhead drops ugly shadows under the eyes and nose. Light from below looks unnatural and slightly menacing, which is why it shows up in horror films. So your default instinct should always be front, a touch to the side, and a touch above. Every setup below is just a different way of getting that same relationship between the light, the face, and the camera.
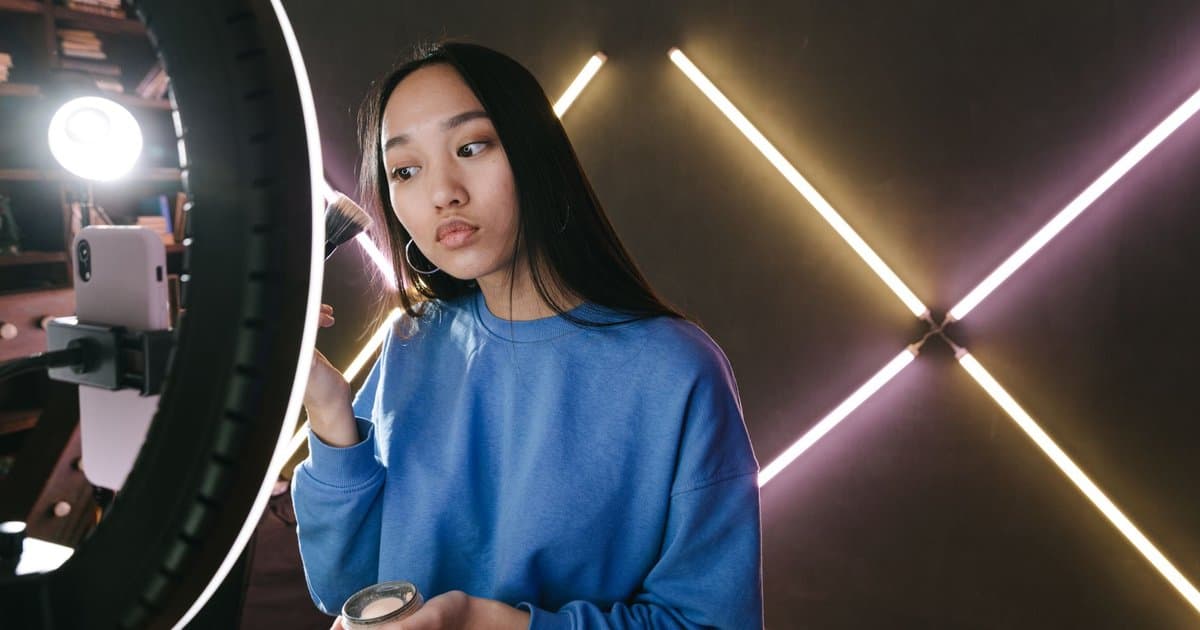
The first setup is the single soft source, and it is the one most people should start with. Take one light, which can be a lamp, a small panel, or even a bright window, and place it in front of the subject at roughly a forty five degree angle. Soften it if you can by bouncing it off a wall or shooting it through a thin white cloth, because hard direct light creates sharp shadows that rarely flatter anyone. With nothing else, this already looks intentional, since one clear direction reads as a deliberate choice. The shadow side of the face adds depth and shape rather than flatness. This is the workhorse, and many polished interviews use little more than this.
The second setup adds a fill to soften that shadow side, and it is the classic two source look. Keep your main light at forty five degrees, then place a second, weaker source on the opposite side to gently lift the shadows. The fill should always be dimmer than the main light, because if the two match in strength you lose the depth that made the first setup work. You do not even need a second lamp for this, since a white poster board or a foam panel placed on the dark side will bounce enough light back to do the job. This is how you control contrast, dialing the shadows from dramatic to soft by moving the fill closer or farther. It looks clean, professional, and easy on the eyes.
The third setup adds separation from the background so the subject does not blend into the wall behind them. Keep your main light and your fill, then add a small light behind and to the side of the subject, aimed at the back of their head and shoulders. This rim of light traces the edge of the person and lifts them off the background, which is what gives footage that finished, three dimensional feel. The back light should be subtle, since a strong one creates a glowing halo that looks fake. Even a cheap clip light tucked out of frame can pull this off. With all three working together, an ordinary room starts to look like a set.
A few practical notes will save you a lot of frustration once you start. Turn off the overhead room lights when you can, because they fight your setup and create messy mixed shadows from above. Watch for mixed color too, since daylight from a window and a warm indoor bulb in the same shot will make skin look strange and uneven. Move the light, not just the dimmer, because distance changes how soft and how strong a source feels. And always judge the result by looking at the face on your screen, not by how the room looks to your eyes, since the camera sees light very differently than you do.
The honest takeaway is that lighting is a skill, not a purchase. Master the single source first, add fill when you want softer shadows, and add a back light when you want depth and separation. None of this requires a studio or a big budget, and most of it can be done with lamps, windows, and a piece of white board. Spend your money on a decent microphone before another light, because once your light is shaped well, the room is already doing most of the work for you.